Sports science has advanced rapidly over the past few decades, and a pro’s power meter is now as important as the saddle. We’d be amazed at human ingenuity, but now people’s attention has shifted from basic riding skills to those numbers on the stopwatch. We play with the power meter repeatedly, and even a 1% increase in power can make We were ecstatic.
But at the same time, our neglect of technology, the basic ability of riding, has also increased. Some people think that you just need to ride fast and that your posture doesn’t really matter, which is something I strongly disagree with.
When I go out to ride, I find that more than 70% of the riders have unstable upper body when pedaling. However, it is strange to say that, from novice to professional rider, there are always those who can’t walk in a straight line, or even can’t change gears.
Riding techniques include pedaling in a seated position, rocking, shifting, cornering… they cannot be ignored. Today, the editor will focus on the techniques and training methods of pedaling in a seated position.

What does pedaling technology stand for?
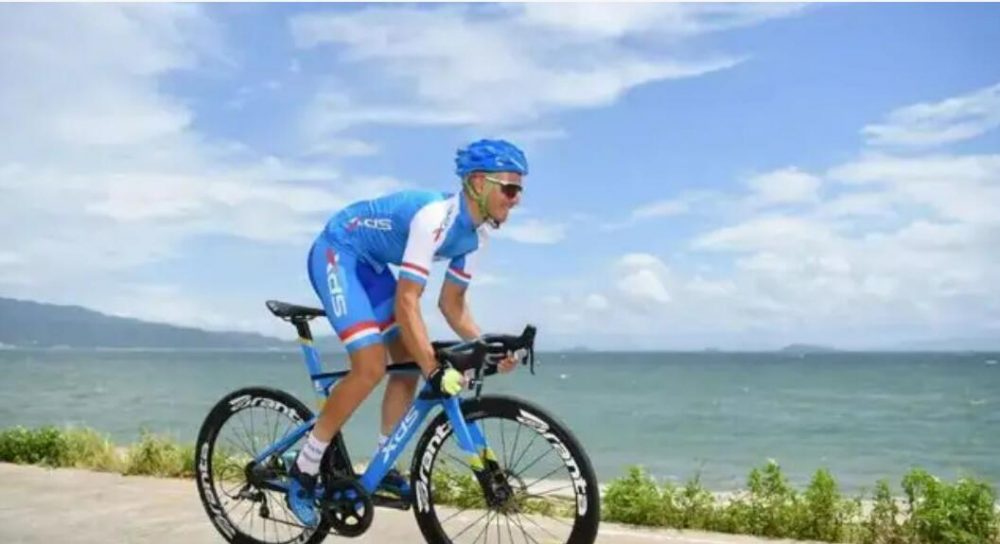
The pedaling technique refers to the smooth pedaling while sitting on the seat cushion, no matter what kind of terrain, it can keep smooth. There is no superfluous movement during pedaling, and the high pedaling technology means less energy is consumed for the same power output.
Perfect pedaling skills are arguably the most important part of riding skills. Everyone aspires to have their pedaling smooth and even, which not only looks smooth, but increases your riding efficiency. Riding efficiency is similar to the fuel consumption of a bicycle, which means that for the same power, you will use less energy, which also means you will ride faster.
The process of stepping
Undoubtedly, if you have been in the car world for a while, you should have heard “stepping on a circle” many times.
As shown in the figure, the pedaling process of all bicycle projects can be modeled. For the convenience of description, the pedaling position is represented by 1-12 o’clock on the dial. For road riders, the power output is mostly concentrated in the 12-5 o’clock direction when pedaling in a seated position, because at this stage you are recruiting most of the power muscles, hip and knee extension, and after the 6 o’clock position, The calves, hamstrings, and rectus femoris will work slightly to speed up the lift.
The perfect tread?
Barrett, Martin, and Bohm’s research shows that training in circles and pulling up on the pedals does not improve efficiency. The above picture shows the difference in the force of two world-class riders during the pedaling process. It can be found that their pedaling curves have Very big difference. Therefore, this article will only give some minor suggestions at some key points. If you feel that these suggestions are not suitable for you, you may not adopt them. Pay more attention to how you feel and find the best pedaling style for you.
The ultimate goal is to solve the “dead point” in the stampede process, including “top dead point (at 12 o’clock)” and “bottom dead point (at 6 o’clock)”.

step down process
In the upper part of the pedaling circle is where you generate the most power, you need to recruit enough muscles to hit the pedals, you can sink your heels slightly so that your glutes, hamstrings and triceps are fully engaged work hard. When you pass 12 o’clock, your toes will slowly drop below your ankles, but you need to control the ankle joints so that your feet are roughly level as you press down.
Lifting process and top dead center
Everyone loses a certain amount of momentum in the process, because you need the other leg to step down and push the leg up. During the lifting process, due to the physiological structure of the human body, your knees will move a little outward. At this time, you can imagine pushing the knees towards the handlebars, which can not only reduce the tendency of the knees to deviate, but also reduce the other The burden of one leg also makes the top dead center transition smoother, resulting in more power.
ankle
Don’t let the ankles be too much higher than the toes during the pedaling process, so as to maintain a relatively uniform power output.
straight up straight down
From the front, the leg you’re pedaling on should be vertical, not a rocking knee and a swaying hip. Your hips, knees, and ankles should be roughly in a vertical line (but not for a small percentage of people). You can put a mirror in front of the trainer to observe your pedaling.
how to improve
When the athlete’s season starts in March, more attention should be paid to power values and less attention to the generation of these values, that is, pedaling technique. Therefore, it is best to improve pedaling ability through some high-quality technical training during the basic period (usually November to March) when there is ample time and low expectations for sports performance.
It should be noted that pedaling training is best done at the beginning of the training, because fatigue will make it difficult to maintain a good posture, so it is difficult to change after the wrong posture is formed into muscle memory, so it is best to ensure yourself before pedaling training. in good condition. Three types of methods are described below.
smoothness training
This training does not need to be carefully designed, as long as you are training in Zone 2 and Zone 3, you can do it. Almost anyone can pedal 300W of power on the flat road, but everyone consumes different energy. The purpose of pedaling training is to reduce the energy consumption as much as possible while maintaining a certain power (such as 300W). At this point you have to keep
good condition
Keep your shoulders relaxed and don’t shrug. Keep your arms slightly bent and your upper body relaxed.
Breathe evenly and deeply. For rhythm training, this is a very important thing.
Multi-speed. Don’t always hit the big gears, change them in time as the terrain changes.
When you get tired, you become insensitive and your posture is deformed, which is not good for a changeable game. When the season starts, you’ll find that this is a serious problem, so start working on it in the winter.
high cadence training
1. On a downhill or a riding platform adjusted to a lower resistance, use 1min to continuously increase the cadence to the maximum (your body can still remain stable at this time), and maintain the maximum cadence until you can no longer persist . As your cadence increases, try to relax your calves and feet, especially your toes, resting at least 3 minutes between sets.
2. Long-distance training with high cadence: do a 2-4h long-distance ride once a week, the duration is about twice your average daily training time, and do 6 sets of 1-minute training in the last 45 minutes, load Intensity training zone 3 (88-90% FTP), cadence above 110rpm. Rest and recover for 1 minute between each load, so the pace will be very fast. At the end of a long-distance ride, people tend to lower their cadence due to fatigue, and high-cadence training can reduce this tendency without causing a lot of load.
low cadence training
Low cadence, with a certain power, means high torque, generally maintained in the third zone (85-88% FTP), which can increase strength, pedal stability, improve the ability to recruit type I muscle fibers, and improve aerobic capacity:
First, warm up in Zone 1 and Zone 2, and perform 4-6 sets of training for 4 minutes. The cadence in the load phase is maintained at 50-60rpm, the power is in Zone 3, and there is a 3-min rest between each load.
Training is best done on moderately sloping hills, not only to increase power output, but also to maintain a smooth, even pedaling cycle and a relaxed upper body.
rocker training
rocker training
The last one is rocker training, which can be said to be an indispensable technique in cycling or competition. People can’t always rock their bikes comfortably, whether you’re a mountain, road, or dual rider, rocking a bike is a must-have skill. If your rocker doesn’t look good, then you might want to do some training on it.
There are many kinds of rocking postures, such as climbing rocking, sprinting rocking and relaxing rocking. There are also many related tutorials, but the author is not going to introduce them in detail for two reasons: first , most people have a very short time to rock the bike, and the rocking time accounts for 5% of the total riding time. Second, everyone’s bone structure, muscle development, flexibility, coordination, etc. There is no set standard. So if you’re not a sprinter or a Contador-like climber, don’t be too obsessed with rocking. Just shake a lot, no matter how you train. However, once you have any discomfort in your knee and ankle joints, stop the rocker immediately and try to avoid sports injuries.
Choose a suitable time, you can either rock the car for a few minutes on the undulating road, or you can alternately sit and step on the rock for 1min for 30s. You have to keep watching while training, what most people ignore is to keep the car in a straight line. As incredible as it may sound, I see this phenomenon every time I ride my bike.
If you are interested in motorized bike and want to know more, you could browse previous articles or visit our Official Website, also choose to leave your message below. If you are interested in electric bike, you can contact us. www.zhsydz.com
 Shuangye ebike
